Uploading images to AWS
Follow the guide below to update image assets in AWS for Campaigner. This includes images for member headers and footers and general email templates images.
Step-by-step guide
- Login to AWS.
- Under storage, click on S3.
- Click on the ras-campaigner folder > images folder. You should see 3 folders;
- The campaign folder containers a header and footer image for each member.
- The content folder contains newsletter related images. If you want to include an image in your newsletter, this is where you upload your images.
- The email folder contains email template related images. If you want to update the newsletter header graphic, this is the folder to upload your change.
- Select the folder to which you want to upload your image(s).
- To upload an image, select upload.
- This will open a small window, drag and drop your images or select them from your file explorer using the add files button.
- Select start upload. It will let you know when the upload is complete.
- Once you have finished uploading your images you may need to update the CloudFront cache for it. This is because all images for RAS Campaigner are served via a CloudFront cache to allow fast loading via caching. To determine if you need to clear the cache read the following conditions;
- If you added a new image, you don't need to clear the cache. You can verify that you can access your new image using the verify your image is accessible instructions below.
- If you updated an image, you will need to clear the CloudFront cache so that it can load in your updated image. Follow the Clear CloudFront cache steps to clear the cache, then follow the verify your image is accessible instructions to check your image is updated.
Verify your image is accessible
To verify your images have been uploaded successfully, browse to your image by entering this URL https://static.campaign.repcoservice.net/images/<folder name>/<file name>.
For example, if you uploaded an image called 'bunny.jpg' into the folder 'content' your URL should be https://static.campaign.repcoservice.net/images/content/bunny.jpg.
Clear CloudFront cache
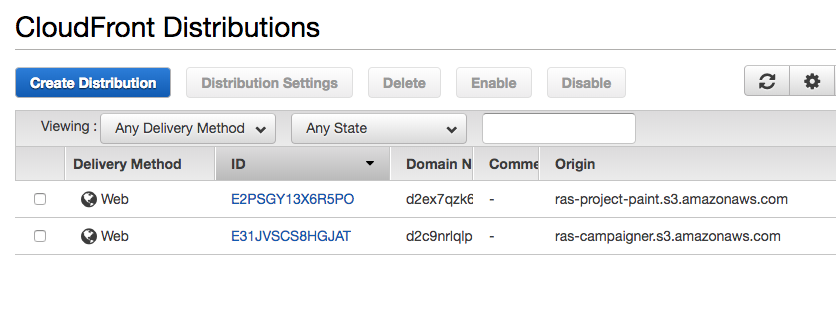
- In AWS, under networking and content delivery click on CloudFront.
- Under CloudFront Distribution title, you should see one row of records named Web, click on the hyperlinked ID.
- Select the invalidations tab.
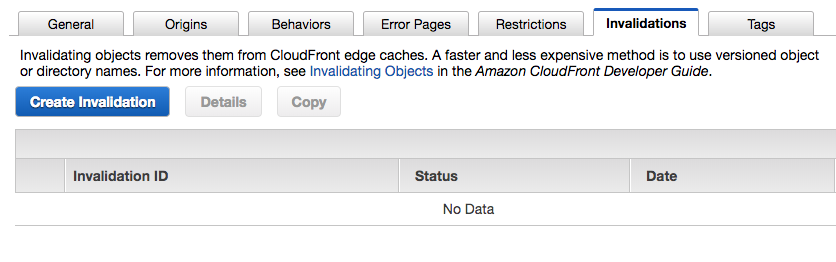
- Create invalidation, this will open a small window.
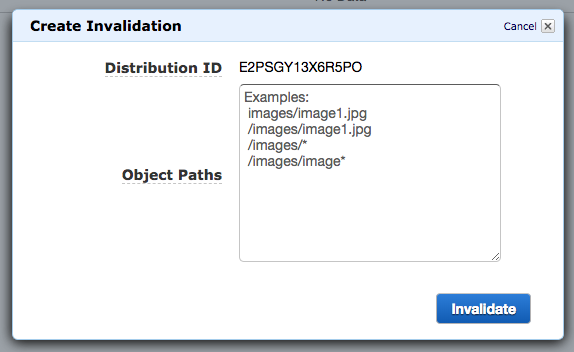
- In the object paths enter the path of the images you updated, for example;
- If you uploaded an image named bunny.jpg in the content folder, you can enter '/images/content/bunny.jpg'.
- If you have uploaded multiple images in the content folder, you can enter '/images/content/*'.
Info: This will take longer as it needs to clear the cache for the entire folder instead of just one particular image). Work out which is the best strategy to clear your cache, if you have uploaded lots of images in one directory, it's easier to clear the entire folder. If you have updated only a few images, it's more efficient to clear those specific images
- Select invalidate.
- Use the steps above to verify your image is accessible.


Once you have these steps complete, you might want to check out the steps for adding the images to Campaigner.